"You are so creative!" I have heard that phrase constantly since I was little. DIY, Refashioning, Crafting, Sewing, Woodworking. I love it all! Now I have a place to keep my favorite projects or ideas organized and share them with you!


Sunday, November 27, 2011

Wooah! I guess it was windy last night.

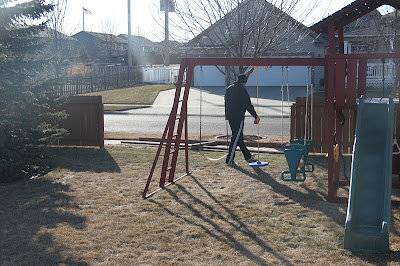
I looked outside this morning ad saw a large hole in the backyard fence.


The strong winds last night, combined with a rotten post, made the fence fall.
Although... many of the posts are doing this thanks to the horrible job whoever built the fence did putting the posts in to begin with..


 They just sit in water in the spring time and many of the cemented supports are just cracked and the fence wiggles.
Such a waste... just goes to show you should never half way do a job.


It is all put back up now with some extra support ... although we are not planning on digging the new post hole until spring since it is 32degrees outside right now but feels like 23 with wind chill.

Digging a new post hole is not fun, especially since we have to dig out the cement mess that they left there.
I am sure once we get three feet of snow the fence will stay put and we won't have to worry about it.
Oh the Joys right?

At least we know how to use a drill, and a hammer. :)

A Christmas Mantel


Whoo hoo! My mantel is done!

It was a project... mainly because I got sick right in the middle of it and it sat half finished for 24 hours which in itself was difficult for me.. looking at a half finished project. Especially one that is so easy. I could not belive how difficult it was to do on zero energy recovering from sickness when in reality it is really an easy project, but after laying around for a day I was bored and wanted to do something!

So there are two projects I want to share with you that I did on my matel.

The first is the letters "J" "O" "Y"   They are made out of cardboard that I paitned red.


Just print the font you want around 650pt font size onto computer paper. Then using a exacto knife you can cut around the letters onto the cardboard.


Add your red paint. 


 Then I hung them with white satin ribbon that has gold edges. My mom has a rather large ribbon stash and I just called her up and said I need some thick cream and gold ribbon and she brought me two choices. So my project ended up costing me nothing since I had the supplies on hand.


Now I am sure you are wondering about my photo frame stocking holders.
They were my solution to a small problem I had.

 We got the kids new stockings this year. We decided that we would only get the kids stockings instead of all five of us. The problem was our hangers.
We had five.. the letters "N" "O" "E" "L" and angel, and a deer.


So we couldn't use the letters since we only needed three, and there were only two shaped ones. So I went up into a box in the closet where I had photo frames and found three silver matching frames.


I put in the pictures and added a little sticky tack and stuck them to three of the letter stocking holders.  They ended up perfect!


Merry Christmas!


Friday, November 25, 2011

It's Beginning to Look a Lot Like Craft-mas!

It's the Friday after Thanksgiving and time to get those projects going!


Well here is what I did with that same frame for the Christmas!
A Pinterest idea of course see the original here.


I might add a few more little things like a bow, but for now this is good to go. Just add some ice skates that don't fit anyone this year that we had in the garage and a small piece of garland. I didn't buy a thing.


Then my 6 year old daughter went to work on this project using ribbon and a large needle she stung all of our silver tone ornaments together in three strands and we hung them from the light above the dinning room table. .


She likes to decorate this light for each holiday so when I showed her this idea she was ready to go. We had these ornaments on hand as well and were not using them where we had before. So once agian... didn't buy anything


Next we want to work on the mantle.. but we have a bit of work left to get that done. For now enjoy these two little projects.

Friday, November 18, 2011

Advent Blocks Church Advent Craft


I have been wanting to make these for a few years now, so when a friend at Church asked me for a family advent craft project I instantly thought of these.

God has blessed our church and we received 2 x 4 donations and people volunteered to cut the pieces to make 200 sets for the families who will attend the Advent family event.


We cut the pieces to 8 inch, 6 inch, 5 inch, and 3 inch lengths. Each set has four blocks, one of each size.

We decided on a four block set, one block for each week of Advent. This also cut down the amount of cutting our volunteers would have to do.

We had a member of the congregation who is an art teacher draw the characters inside a rectangle that matched the dimensions of what we cut the blocks to.
 The angel and the shepard are on one block.

The star is on it's own block.

Baby Jesus is on his own block.

Mary and Joseph are on one block.


I used this easy and cheap mod podge recipe, colored pencils, craft paint and glitter for my set. I think later I might spray a coat of clear spray paint on them  too to seal everything in better so that it will last for years. But at Church we will keep costs lower and people can choose to spray them at home if they wish.
We also have scripture pieces that go along with each piece.

I will include those later. I am not sure what they are yet. That was not my part of the project.

 
I plan on mod podging the scripture to the back side of each block once I get them.


Happy Advent!

Thursday, November 17, 2011

Upcycled Pallet Wood Signs for the Laundry Room


Problem: A Cluttered Laundry Area

Why: It is a high traffic area we walk by every day entering and leaving our home. It is in the entryway near the garage door. There are a few design flaws that make it impossible to hide the laundry area behind bi-fold door which I believe were the original plan for the space. So because it is always open it becomes a dumping ground for anything we have in our hands when we enter our home. The surrounding space is our storage area for shoes and coats etc. So there is much in the middle of it all.

What I did:
First I emptied and purged the entire area of things that didn't belong there!

When the space was empty, I took down the chipped white shelf and supports and gave it a nice coat of purple spray enamel. The white shelf was beginning to show brown chip board though in spots and just looked horrible. Now it looks nice and new.


Then I took out any cleaning supplies we had not used in the past year and found a new home for them. Next I took any cleaning supplies that we didn't use for laundry or duplicates and put them under locked bathroom cabinets. They were mostly bathroom cleaning supplies anyway so why are they in the laundry room???


We have a towel bar next to our utility sink in the area, we do not use this sink often, and when we do we use paper towels because we are usually washing paint or other hazardous things such as oil off our hands.


So I decided to use the Pinterest tip I saw and hang the cleaning products that were in spray bottles on the towel bar. This freed up even more shelf space and actually gave a purpose to the towel bar.


Then I needed something to make the space look more fun! Cause laundry is FUN right??? I decided to go with a couple signs made from a pallet we have in the basement. I think everyone should have a pallet at their house. It is so fun to be able to hack into it and make whatever you feel like and not worry about spending money on wood.

Oh how I love upcycling!


So I cut two pieces of pallet out, then made one a reverse stencil and painted the letters on the other in the same purple as the spray paint. It was good practice for a future project I have in mind.

I then used another Pinterest tip and used pop tabs in order to hang them on the wall. I love Pinterest.
So my laundry area is not as fancy as some of the beautiful laundry rooms I have seen on Pinterest, but it is MUCH MUCH better than it was before.

Future improvements include making fabric covers for the plastic milk crates, that I tried to spray paint. Free pattern to do so here.


I would LOVE to have these under my washer and dryer. Althogh I am unsure if I would be able to reach my laundry in the bottom of my top load washer.
The plans to make this awesome platform are here.


And I am thinking a giant sign that says LAUNDRY above the shelf would look neat as well.. But those are projects for another day.

For now this is my Laundry Room and it is much better than it was.

Tuesday, November 15, 2011

5 Minute Open Mouth Clothespin Bag.


I dove into reorganizing our entryway/laundry room today. I am trying to make our life run smoother and take care of a few trouble spots in our home to make them easier to use and nicer to look at without spending money.

I have already gone thought two cans of old spray paint trying to make things look a bit better. But that is another story.

Today's quick posted project is a quick solution to this problem..


An open bag of clothes pins. We usually have them sitting on a crowded shelf in the laundry room.

I knew I could do something to fix this situation and it wouldn't take me long at all.

My supplies were...
Some scrap fabric and an empty disinfecting wipes container.


I sewed a tunnel in the top of my fabric and cut a strip of the wipe container to fit. The container piece kept it's round shape. 


I slid the plastic piece into the tunnel. Turned it backwards to sew the bottom and open end closed and used another scrap to make a hanging loop.


Done! 5 minutes tops.
 More like 2 minutes if I didn't count my supply search time.


No open bag spilling everywhere, and it hangs from our retractable clothesline hooks so there is more room on the shelf now.

I think I will be making a couple more of these.
Maybe a few hanging garbage cans for the car near each child,
and another for a small garbage for my daughter's loft bed.

Sunday, November 13, 2011

Loft Curtains Refashion


We got my daughter a loft! It was JUST what I was searching for and I found it on Craigs list!

The only thing was.. The curtains it came with did not match her room colors at all.. I really considered making different curtains, but I am more of an upcycle kind of gal and find it difficult to replace something that is is perfectly good condition, but just the wrong color. They were really nice thick sturdy large curains. 

They were a dark kaki color with red around the outside. Perfect match for my son's room but this loft is for my daugher not my son.

I went as far as going to a fabric store to scope out fabric costs to make new curtains. 
Then it came to me! 

The perfect idea to makeover the curtains we had to make them fit into the room.

We had already picked out a new striped fabric for her hanging bookshelf. I loved that project so if you have the time to click over and check it out, you really should. Many of the colors of that fabric were already in the room, but there were also some new colors in the fabric that made it easier to make the curtain we had work...

I just needed a few things.... NOTIONS!

We picked out some ribbons and rick rack and even some bias tape. When I had all the colors and textures we wanted... I found It was still much less expensive to refashion the curtains than it would be to buy fabric to make new ones. I was excited and so was my daughter who helped me pick out all the notions.

We ended up with...
Lime Green larg rick rack.

A wide magenta ruffle ribbon.

Some medum sized Yellow rick rack.


Some wide turqoise grosgrain ribbon with lime green dots.

Some navy double fold bias tape, because it was cheap.


When we were finished the curtains looked like this!


What do you think?
We are super happy with our idea and stripe color choices. I think that the rick rack gives it a bit of gingerbread house look next to the kacki colored fabric.


Peek!


But even the brother thinks under the loft is the cool place to be.

Update: I kid you not.. just a few weeks later I walk into a thrift store and get a matching duvet cover that looks like it was made to match her loft curtains. AND.. it was %50 off. So my nice $5 purchase tied the whole thing together.

It even has wavy rick rack stripes in it.
Transition went well.. She is all moved in!

If you were eyeing the hanging fabric hanging booksling she has see that post here.

Saturday, November 12, 2011

Fireplace Update, RUST-OLEUM Specialty High Heat

Yep we had those lovely dated brass vents on our fireplace... But now no more!

Before:


After:

Thanks to some nice black RUST-OLEUM High Heat spray paint.


We removed the pieces and brought them outside and gave them two coats of the spray pant, let them dry and put them back on.


Not only were we able to update that fireplace, but do you see the problem we were having with our other fireplace?

If you look at the back wall you might notice that there was rust taking over the inside walls of the fireplace. This picture doesn't even show how much there really was. I was actually taking a photo of the logs, it is always impossible to remember how to put them back in.

But we were able to put two coats on this rust as well.


As you can see it now looks BRAND NEW!

I do suggest you do the inside spraying on a day you are able to open the house for ventilation. This product does have some pretty strong fumes to it. Lucky for us it was a nice fall day outside and we were able to open the windows and the fumes went away quickly and the product dried in less than an hour.

We were able to do both projects with one can of the spray.
It is heat rated up to 1200 degree.
You can even use it to spray your grill!

I am so glad someone someplace thought of this stuff!