"You are so creative!" I have heard that phrase constantly since I was little. DIY, Refashioning, Crafting, Sewing, Woodworking. I love it all! Now I have a place to keep my favorite projects or ideas organized and share them with you!


Thursday, October 28, 2010

Havin' A "Ball" for Halloween!

Out on a thrift store run today my youngest found...

"A ball."

His favorite word. "Ball ..ball.. ball... ball.." I hear this word a lot in a day. We do have balls, we have one just the same size as the ball he found but it is a pretty purple and white one. Not that my boy knows that purple is girly, but some days you just need a new ball.

Photobucket
Ok to tell you the truth it is entirely too hard to say no to this face!
This ball is orange. Plain orange. It is not fancy colored or covered with a Disney Character. Just orange. So we spent a big fifty cents to bring home the orange ball.

Once home I noticed that someone once upon a time had drawn some spirals on parts of the ball, they were very faded and you couldn't see them too much, but it was enough to inspire me.

If they can draw on a ball why can't I? And... what else would you possibly draw on an orange ball this time of year???

Photobucket

I am sure you guessed it.

Here is my son Jack with is Jack-o-Lantern Ball. The perfect Halloween gift for him since I am sure he won't be able to eat much of the candy.

Photobucket

Now he can stop trying to bounce the pumpkins.

Linked up here.
Katie's Nesting Spot

Monday, October 25, 2010

Fairy Wings.

Photobucket

I forgot I promised these before Oct. 31st and I guess it still is before that date. I am not sure anyone will jump at the idea of making them now with the big day so close at hand, but maybe a great girl Christmas gift. Pre-make the wings and some decorating supplies and it becomes a great girl craft project.

I know you can buy fairy wings pretty cheap these days especially after Halloween. But sometimes fairy wings that you make can be more fun. Why??

1. You can decorate them anyway you want to. So that in itself becomes an awesome project for any fairy lover. Fabric markers, Glitter glue, Gems, you name it. Decorating wings is a great girl project.
2. Sometimes you need wings when you can't find them. Sure they are easy to find around Halloween but what about other times?
3. When you make them yourself you can make whatever shape or size you want or need.


What you need:
Photobucket

5 or 7 Gage Wire I get mine at Ace Hardware store. I believe that this spool is 7 gage, but it could be 5 gage. I got it so long ago I don't remember. Go with something that is easy to bend, yet not too easy that if a fairy falls that they won't get bent out of shape.

Photobucket

Two Containers of Knee High panty hose. We found a great price at Walmart around 4 for $1 and they come in a tiny plastic container that works great for this other project so hang on to the plastic container!! We used white.

Elastic About any strip elastic will do. I think ours was round half inch in width.

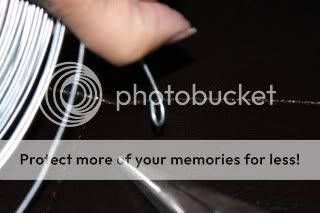
First use a needle nose pliers and make a small bend in the end of the wire. Do not close the loop yet.
Photobucket

Bend your first fairy wing shape and then hook your bend around the wire where you want them to connect. We made our wings the shape of candy corn to go with this costume. Then close the loop of the wire around the other wire.

Photobucket

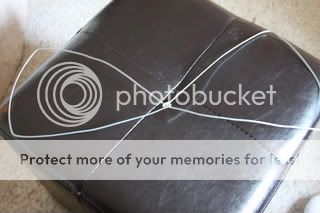
Repeat for the second wing and then trim the wire so you can make a loop at the other end. This loop I hook inside the other loop so that the wing set stays in place.
Photobucket

Photobucket

Repeat these steps so you have a set of two wings.
Photobucket

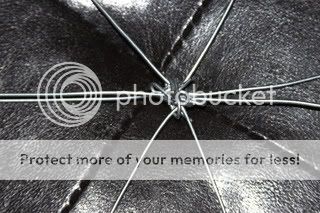
Then you need to connect the two sets. Do this by wrapping wire around the two sets to make them secure. You don't have to worry about how this looks, it will be covered by the tights, but try to make sure all your sharp ends are tucked in so that they do not snag your nylons.
Photobucket

Next take your nylons and put one on each wing.

Photobucket

Choose one side of your wings to be the back. Pull the extra nylon tight and twist into a long piece and tie off with a knot. If you have enough extra you can wrap it around the front and back to the back side and tie to another piece of nylon. Do not cut extra lengh off yet.

Make your arm loops by ting two circles of elastic. I attached mine by putting tying some extra lenghts together on the backside of the wings with this looped elastic under the knot.

Photobucket

Photobucket

Photobucket

Upcycled Frappuccino Bottles

Photobucket

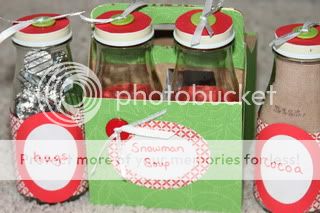
By upcycling an empty 4 pack of Starbucks Frappucino, you can make this adorable gift.

Photobucket

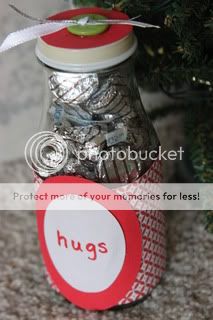
Wash and dry the bottles thoroughly then fill each bottle with a special treat. We used hot Cocoa, Marshmallows, Hershey Hugs, and Candy Canes. Then decorate the bottles and cardboard holder with scrapbook paper and supplies.

Photobucket

Photobucket

Don’t like the idea of hot chocolate? Fill with whatever you want. How about a candy theme with holiday m&m’s or maybe a spa theme with home-made bath salts?

Photobucket

Photobucket

If four bottles seem a bit too much work? Consider giving one decorated bottle filled with Candy for a gift that is totally cute! One bottle filled with candy can fit nicely into a teen's stocking.

Photobucket

Other cute ideas:

Desk Candy
Make for a grandparent's desk at work with a photo of their grand kids on the front. They can offer co-workers a treat and they can look at her cute grand kids. Fill with any candy, Whoppers, gumballs, Nibs, Kisses, M&M's whatever they like best.

Spa Bottles
Make one to match a bathroom colors or use cute non-holiday paper and fill with spa items such as cotton balls, bath beads, and bath salts.

Football Theme for Grandpa or Dad
Decorate with a their favorite football team theme and fill each bottle with different kinds of nuts for them to munch on during the big game. Chocolate covered peanuts, Cashews, Dry roasted almonds.

Linkded up here:

Painted Pumpkins

Photobucket

My mother actually had around 100 of these short cut landscape timbers in her garage from another project she no longer makes.
She asked if I could use them for anything. I said YES!

Photobucket

Thus for The Hood Magazine October free family craft project we painted them to look like pumpkins. Then added a plastic leaf and a stem made from a brown paper sack. A staple gun helped hold the top decorations in place.

Photobucket

Great activity that worked for ALL ages. Everyone could get as fancy or as simple as they wanted.

Photobucket

We held our activity outdoors at a park. We covered the picnic tables with some black garbage bags to keep the mess down. Lucky that I was looking for a place to re-use a bunch of plastic kids cups I had saved from restaurants. They made great paint holders.

Photobucket

Each painter had a sturdy paper plate that we put their block on, then they used it to carry their project home on too.

Photobucket

Very inexpensive project for us, and it worked out great.

Photobucket
Talk about some Crafting Cuties!

Linking up here..

The Girl Creative

Thursday, October 21, 2010

Spiral Wire Pumpkin.

Photobucket

I LOVE WIRE!!

I have worked with wire for years. I have made all sorts of things from napkin rings (I will save those for a November post), flowers, jewelry, and even hanging candle lanterns using this stuff. I even made a buck or two in the past selling the things I made at my mom's craft booths. A good way to make some extra cash in high school and college. I haven't touched wire in a while and have not yet posted any wire ideas.

While at the downtown public library in September I saw a book called Halloween 101 Frightfully Good Ideas and knew right away I wanted to get my wire back out. Of cousre the book just says decorate with wire pretty much, so I wanted to give you more of tutorial than they did.


Yet again I almost didn't make the pumpkin project, but a new friend down at the Museum of Visual Materials was gracious enough to gift me an extra pumpkin so I could share this project with you. Thanks Jessica!

I must say that a spiral has to be my all time favorite shape. I use it for many things. Even my band's logo


But for now I want to show you how easy it is to work with wire and make this project.

What you need:
Spool of wire (I have always bought mine at Ace Hardware there are many gages I just grab one I think looks best, honestly I can't even tell yo what gage it is, I think maybe 5 or 7.)
Needle nose pliers
Wire cutter (sometimes the pliers has one built in this one does.)
Photobucket


First I want to teach you how to make a simple spiral.

Photobucket

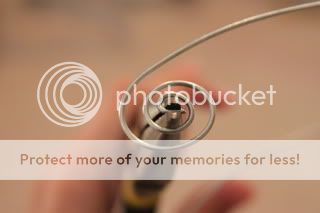
Take your pliers and hold the end of the wire with the end of the pliers. Then hold the rest of the wire with your left hand. Start to twist the wire around the end of the pliers by twisting the players.

Photobucket

Once it is around the pliers you can either bend the rest by hand until your spiral is the way you want it, or reposition the pliers to the spot where the spiral ends for more leverage, then keep going. Snip off the end.
Photobucket

Now to make a spiral for the pumpkin you will do the same thing only add two steps. First step you will need to make a 90 degree bend in your wire. To do this place the wire further up on your pliers and then bend the wire over sideways.

Photobucket

Photobucket

Then you will place your pliers on the long part of the wire near the bend and start your spiral there.

Photobucket

Once you get the size you want leave a bit of wire extra and cut. Then bend this extra wire at a 90 degree angle as well so that it matches the beginning angle. The two ends should now be facing the correct direction to stick into your pumpkin.

Photobucket

You can make all kinds of shapes. Like a double spiral.

Photobucket

A spiral with an extra wiggle at the end.

Photobucket

I have even made treble clef shapes with the wire before. The possibilities are endless.

Then pop them into your pumpkin, and you are done! I just love spirals.

Photobucket

Have fun, get funky!

Tuesday, October 19, 2010

The Bat-mobile / Cookie Cutter Painting

Photobucket

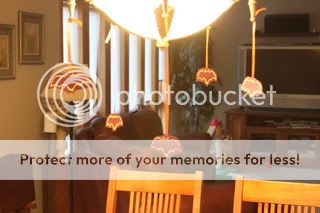
You don't need to know how to draw or paint a bat for this project. This is easy enough the kids can do it. The trick is using a cookie cutter as a paint stamp. We have used cookie cutters as paint stamps before to make holiday artwork, or fun wrapping paper. It is a fun to use something in a new way.

What you need:
Paper (I used purple card stock)
Ribbon (I used orange)
Paint (I used light green)
Tape
Bat Shaped Cookie Cutter.

Photobucket

How:
Put some paint on a paper plate. Use the bat cookie cutter as a stamp and make your bat shapes. Let them dry. Cut them out. Tape them to some ribbon. I used two bat cut outs on each ribbon so that they were double sided. Then I tied them onto our hanging light over our dinning room table.

Photobucket