"You are so creative!" I have heard that phrase constantly since I was little. DIY, Refashioning, Crafting, Sewing, Woodworking. I love it all! Now I have a place to keep my favorite projects or ideas organized and share them with you!


Saturday, May 29, 2010

Play Stucture Talking Tube

Photobucket

If you have been to a modern playground in the last ten years you may have seen the tube that comes up out of the ground with a megaphone shape at the end. There is usually a matching tube someplace on the playground. The idea is that you are supposed to talk through the tube to your friends who can talk back. They work great until somone hopelessly clogs them with woodchips from the playground. They look something like this.

Photobucket

Well this is the same idea.
I actually got the idea while reading a Family Fun magazine at the dentist office. They used very large tubes called drain tile. I opted for the smaller version to fit our structure. We used 1 1/4" sump pump tube. It was around $8 for 24' at a hardware store. We used 12 feet for our project. Here is the other 12 feet still in the package so you know what you are looking for.

Photobucket

Then I took it and spiraled it down one of the supports of the structure and secured it with plastic cable ties.
The kids LOVED it, even my youngest who at 14 months was a pro at yelling in the tube and giggled when he heard his sister's voice sound back from the tube back.

Photobucket
My 14 month old son yelling in the tube.

Photobucket

Look how he is trying to figure out where his sister is.

Photobucket

He checks to see if she is in the tube since that is where her voice is coming from.


My older two also had fun sending a bouncy ball down the spiral to eachother over and over again. This simple tube provided much entertainment and I am sure it will continue to do so.

Photobucket
Of course talking is much more fun than listening. This helps them figure out that it doesn't always work to talk at the same time.
Simple Outdoor Bench

Photobucket

With springtime yard cleanup and projects, sometimes you find a new project from the leftovers of an old. That was the case with this project. We decided to spruce up the kids play structure in the backyard since it was looking kind of worn and weathered. It was there when we moved in and had already been spruced up once as the evidence of chipped red barn paint. We decided to replace the horribly warped roof of the structure during the spruce up. It was a bit of an eye sore and we didn't feel it was fair to make the neighbors look at it any longer. This left me with a pile of worn warped wood that had been weathered and had chipped red barn paint on it. Distressed wood so to speak.
Now I had a few choices... Toss the wood, store the wood in a pile in the garage, or make something else out of it.

So I headed over to the website Knock-off-wood. It is written by a mom who likes to look at wood furniture sold by places such as Pottery Barn and draw up free plans for building it yourself for a fraction of the cost. Of course I love a deal, and am handy myself so this was a perfect fit for me. Free plans? I like free!

I actually headed to their Facebook fan page and posted a picture of the wood and asked what I should build. Here was the picture I sent her.

Photobucket

I was going to build some planters, but then decided to take Anna (the author of knock-off-woods advice and build a bench out of it. Her other suggestions were a headboard, or coffee table but since the wood was treated from wood from a play structure it was a better idea to keep it outdoors.
I then took the plans found here and modified them a bit to just use the boards I had taken off of the structure.

Photobucket

I made it easier by just making it as long as the boards were already so I didn't have to trim as much and the other measurements I used were mostly just the other boards cut into 8th's or 4th's for the legs. Not too much measuring or math needed that way. This made the project go pretty quickly and I was able to do this project with my helpers playing nearby or even helping build. They are good a putting screws in holes and grabbing me things I need. The rest of the time they played in the water table, on our play structure and with squirt guns. They like making things. They thought it was neat that it was a pile of old wood and now it is a bench.

Photobucket

We actually used it the day after we made it by our fire pit as we roasted smores and sat together as a family by the fire.
I am having a backyard event this month and it is bound to get some good use then as well! Plenty of room for four adults. Sturdy like you wouldn't believe.

Photobucket

Anna from Knock-off Wood commented on my finished project herself! These were her words taken off of Fcebook below the picture of my finished bench.
"I love this, a couple of hours and free, already distressed! This would be like hundreds of dollars in a retail store! Nice work!"

Photobucket

I liked making this project because the wood was older and if I made a mistake and drilled a hole in the wrong place. No one will notice. It will only add to the character of the wood. It takes a lot of pressure off when you know you don't have to be perfect. You can just enjoy the process and the end product you created.

Photobucket

Have to add that my bench project made the bragging boards on the Knock-off Wood Blog!
Check it out here! Whoohoo!

Sunday, May 23, 2010

Sleepy Time Owl Stuffy

Photobucket

So busy these days haven't had much time to craft with all the activities going on and spring clean up and maintenance that goes with warmer weather. Yet my daughter was begging and pleading to do a project with her, and after listening to her beg all weekend I decided to get out my machine.

Photobucket

She is a stuffed animal fanatic.
We once made a very tossed together tiny stuffed bear. So she knows making stuffed things is possible to do. Shhh don't tell her about "build a bear" We do that at our own house for much cheaper.
So first it was another bear she wanted, then she decided that a bunny would be fun, then a snake maybe and I think a whale even the choice for a while. Since I knew she was up in the air about what to make I got her to go with my idea. A Sleepy Time Owl.
Owls are pretty popular right now for children's bedroom decor. I went to etsy.com and did a simple search for stuffed owl and came up with over 700 stuffed owls made by people who are trying to sell them. Some for an ok price and some pretty expensive.
So we got out the scrap fabric. Turns out we still had enough scrap fabric from the quilt my mother made for her when she was a baby and she still uses on her bed, to make the owl with. Coordinating!! How exciting.

I found some old stabilizer sheets and two sided tape, I got free for attending a free polar fleece class at a local fabric store. These came in handy and didn't cost me a thing. What we didn't have was stuffing. So we used some older fabric scraps and old torn t-shirts from the rag bucket. So honestly this project cost us nothing, we just used what we had. You could very easily do this whole project with and old dress shirt or two if you wanted.

Photobucket

I made a paper pattern then traced and turned it over on my fabric and traced it again. Then I cut out one owl shape and attached a circle with the stabilizer paper on it. Ideally I would have used fusible web but didn't have any in the house and I didn't know what I was going to use the paper for anyway.
Once it is placed on the owl I used a zig zag stitch around the outside. If I wanted this to last a really long time I would have made my stitches more close together but opted for a wider stitch this time. I think it will just end up sitting on her bed more than drug everywhere.

Photobucket

I repeated the same for the beak, and the eyes starting with larger circles first then the smaller ones.
Then we had to decide what buttons we wanted to use for the center of the eye.

Photobucket

Purple- didn't match this bothered her, but i liked the dark contrast.

Photobucket

Green- Loved the shape but we had put green on there and they just didn't contrast enough.

Photobucket

Pink- Probably my least favorite, but it is not my stuffed owl it is hers and this is what she picked.

Photobucket

Now honestly right then and there I almost decided to applicae it to a large t-shirt making her an adorable summer night gown, but of couse my stuffed animal fan wouldn't have it. Maybe another day.

Then we stitched it, right sides together with the other owl piece leaving the bottom open for stuffing.

Photobucket

Stuffed him with scrap fabric. Stitched it shut, and we were done.

Photobucket

Here it is with her matching quilt made by grandma.

Photobucket

She was happy with it.

Friday, May 14, 2010

A Children's Garden

Photobucket

Gardening is great for kids! It helps them learn responsibility and it helps learn about vegetables and how things grow.

This is our Children's garden! Hopefully I can add pictures as it grows this summer the picture above is from a couple summers ago. Love Giant Sunflowers!!! I wanted to share with you some of the special things we have done with it.

First of all the space has rocks. I am not very good at the whole weeding thing so the fact that this space had rock in it didn't bother me. It was actually ideal!

Photobucket

I went to the food service area at the Daycare facility I used to work at. They get fruit and veggies for the kids in large cans. Very similar to the ones coffee comes in. I took nine of these home cut the bottom and top off so that they were a hollow tube.
I took the tubes and spray painted them with light green paint. Inside outside and on all edges. I did this to help slow rusting. Once they were dry I took them out to the garden and placed them where I wanted them to be. I carefully moved the rocks and cut through our landscape fabric so I could bury the cans half way into the ground. Then I placed the rocks back around the outside of the can.

Photobucket

Inside the can I made sure to dig up the ground a bit and add some more dirt. This is where we plant our seeds. If you look closely, you can see our first sprout!!

The chicken wire cages are new this year. We had issues with rabbits last year eating EVERYTHING as it came up, even things that they didn't the first year. So this year we are using the chicken wire tubes we made to protect the seedlings as they come up.

Photobucket

The space already had a few day lilies and a couple lilac bushes. This left the whole front open. I knew just what I wanted to put there.

Photobucket

Photobucket

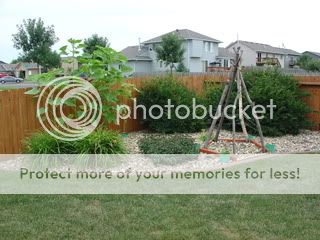
Our tee-pee frame is made of scrap wood in the shape of a pentagon that we buried part way in the rocks, and five tree branch posts.

Photobucket

We secured it together with screws at the top and at the base. The first year we had some success with getting things to climb up but we had originally used string around the tee-pee for the plants to climb and after a mid summer strong storm the sting gave way and our plants were no longer climbing and badly storm beaten. So we replaced the sting with sturdy wire and we hope this year will be our year! It is enjoyed anyway as it is!

Photobucket

Of course you need a flag! It used to be a pinwheel but it broke. The flag looks better anyway!

Photobucket

You need signs too. These are just scrap wood we had. My daughter painted the flowers on these a two years ago as well. I did the letters and the outline. Yes they are weathered, but work great, and we will probably redo them on a day we need some project to do this summer.

Photobucket

Watering is the best part!

We have planted Sunflowers, Corn, zucchini, Summer squash, cucumbers, and a couple tomato plants in the planter. We will let you know how things turn out this year!

Photobucket

We are also planning on adding and making our own stepping stones this year!

Thursday, May 13, 2010

Rainy Day Box

My kids LOVE boxes. What kid doesn't. Use it to your advantage on a rainy day!

Not a box of stuff for a rainy day, but a box for a rainy day. Not to use outside in the rain, but inside!

Do you have an empty box or two laying around and kids driving you up the walls? Grab it and get them started. You will experience some peace!!

Photobucket

What you need:
Cardboard box of any size!!!
Crayons (or markers but markers are scary to use on or near carpet so we always use crayons)


Notice rainy days are pajama days are our place sometimes too. Today was a pajama day so thus the PJ pics.
Photobucket
Photobucket

Next time you get a cardboard box, in the mail or from buying something new. Keep it!!! Save it for a day when you have no place to go, or have to stay home. Then next time you are stuck at home and going crazy, grab all of your crayons and get out the boxes. That is all you need for at least a couple hours of entertainment!!!

Photobucket

Photobucket

My kids love to color on boxes. They decorate them with all kinds of things. We have a box house, we have a box spaceship, They have been horse stables, and boats, and cars, and trains, tunnels for cars, tunnels for kids, we have even have a box that my daughter decided to color to make it a box for her brother Jack. Get it? (Jack in the box!) We have boxes decorated to be houses or beds for stuffed animals. My sister in law had a whole box city in her basement by taping boxes together it was a huge fort!

Just look at the fun artwork that comes from this as well! Almost as fun as coloring on walls!!

Photobucket
Photobucket
Photobucket
Photobucket

What is cool about it is this. My kids can spend around 30 minutes decorating their boxes with crayons, just the way they want them. Then they imagine and play for at least another hour with the box. Then while they are playing they get more ideas of different things to add or different ways to decorate them. Or ideas turn it into something else. My daughter has even colored pictures on paper and taped them inside the box to decorate more. Buttons and controls for her spaceship. Decor for their house. The sky is the limit!! So next time you have a box. Don't toss it! Save it for a rainy day. You will be glad you did!

Here is one of our larger projects. The box actually came from a doorway playhouse we got for my niece. We cut the two narrow boxes open and taped them together. We didn't know when we bought a playhouse for our niece that we could be getting a playhouse too! This has been an ongoing project now for almost two years in our basement! They love it. You can see it is well decorated!

Photobucket

Photobucket

Where to get boxes. Call furniture stores to see if they have any handy. The boxes our kids each have one of came from end tables. I hear people call appliance places and get refrigerator boxes! Those would be great fun! Diaper boxes are fun for building barbie rooms, or action figure hang outs! Great fun!

Wednesday, May 12, 2010

Girls Dress from Men's T-shirt

Photobucket

I know I told some of you I was done sewing for a while, but it rained all day, the kids took good naps and I remembered I had supplies to do this at my house! What else was I supposed to do. All the laundry was done already! That was yesterday's rainy day project. So here we go!

Of course the idea came from MADE here.

Photobucket

Here is my before. I almost forgot to take a picture of it! See it is actually already cut!

And after

Photobucket

What you need:
Men's T-Shirt
Elastic Thread
Sewing Machine
Scissors
Other regular sewing supplies.


Photobucket

Cut off the sleeves (save them you will need them later) and collar so that it is straight across. Like shown above.

Photobucket

Now you need to take your elastic thread and hand wind it onto your bobbin. Fill it up. I had to refill it once during this project. You want to pull it tight as you wind it on the bobbin. Do no use your machine to fill you bobbin it will not work. So others have said.

Then stitch around the top. I did five rows. It is supposed to be bumpy. The first row may be a bit straight but the more rows you do the more gathered it gets. I did five rows. I used the edge of my presser foot as the guide between rows.

Measure down and do the same for the waist of the dress. You will need to draw a chalk line around your shirt to start. Then you can follow the other stitch lines. Don't try without a line guide. You will get lost! I did, it was all crooked,and had to find my seam ripper and start again. I did five rows for the waist as well.

Once the top and waist are done, you will need to turn it inside out and fit it onto your model. This will let you know how wide it needs to be. You can do this before sewing your lines but I didn't happen to do it that way. Pin sides so the garment fits then stitch the side seams. (take it in so to speak.)


Photobucket

Cut one sleeve into strips that are about 1 inch wide. They will be circles.

Photobucket

Cut them near the seem so that they are long.

Photobucket

Then grab both ends and pull. They should roll onto themselves and make strings.

Photobucket

Tie a knot at one end and sew untied end to top of your dress. Do this four times. Two on front and two on the back. Then tie ends together and you are done.

I also made one more string and tied knots at both ends. I used this for a bow at the front of the waist of the dress. It is just for looks, but I like how it looks!

Photobucket

Photobucket

My girl also refashioned the end of the sleeve into a matching headband! That's my girl! No sewing needed! Fit perfectly!

Photobucket

Photobucket